This is a story about my way to the Camunda Certified Engineer while working at “J-IT” IT-Dienstleistungs GesmbH.

As you can imagine, the very first thing to do when starting at a new company is inspecting the Coffee Machines. Good for me, I found out that we have two of them.
While I’m not a particular coffee aficionado, I must admit have learned a thing or two about Coffee already.
But first things first, let’s set up the Laptop at my disposal, a Lenovo X1 Extreme, with an i7 10th Gen, 32GB of RAM, a 60GB 7200 rpm Hard Disk (just kidding!), and no default password set.
Changing Passwords
Getting Passwords nowadays is not as simple as “getting them”. There are company policies preventing you from using an easy-to-remember “123456” as a password. Stupid policies!
So the first thing to do is change your password. Which usually goes like this:

That was tough! Time for a coffee.
Getting familiar with the Coffee machines
Melitta Cafina XT4
First, I tried the fully automatic Melitta Cafina XT4. It looks like this:
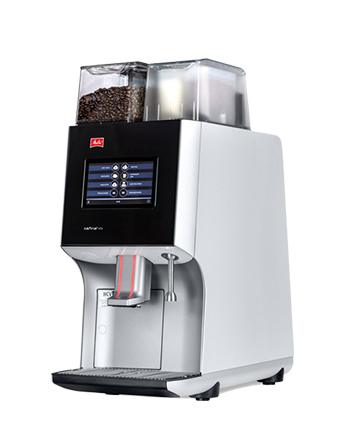
It has Wifi, boasts more followers on Twitter than me, allegedly is a member of a Motorcycle Gang, and honestly, we do really not dare to ask how it spends its weekends. Probably badmouthing other coffee machines.
But, it definitely has a Touchscreen, and all you have to do is put your glass under it, and press “Latte Macchiato”:
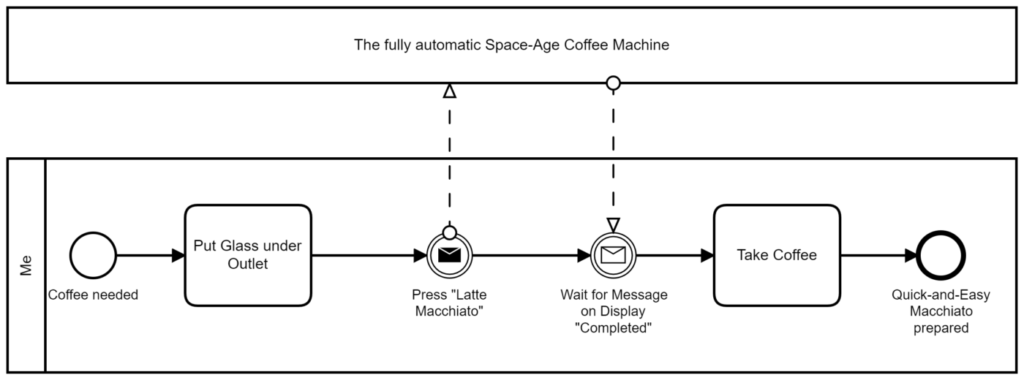
It does this with amazing precision unless it had a rough weekend and the technician has to come and fix it up.
Given the simplicity of the Process, I must say the result is really delicious.
DeLonghi Dedica
Now this is something else:
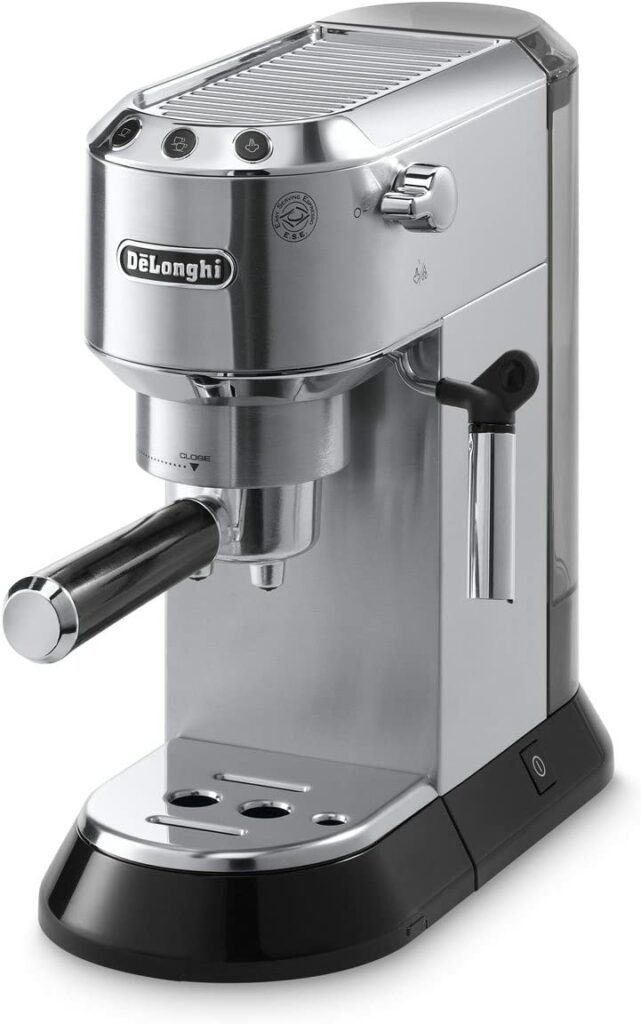
This is more like an Italian Diva of coffee machines: if you do not press its buttons in the exact right sequence, it flat out refuses to do anything, except flashing its lights innocently.
It starts with using putting coffee in the portafilter and then pressing the button to force the heated water through it. It is also capable of producing milk foam. If you are going for the full show, it would look something like this:
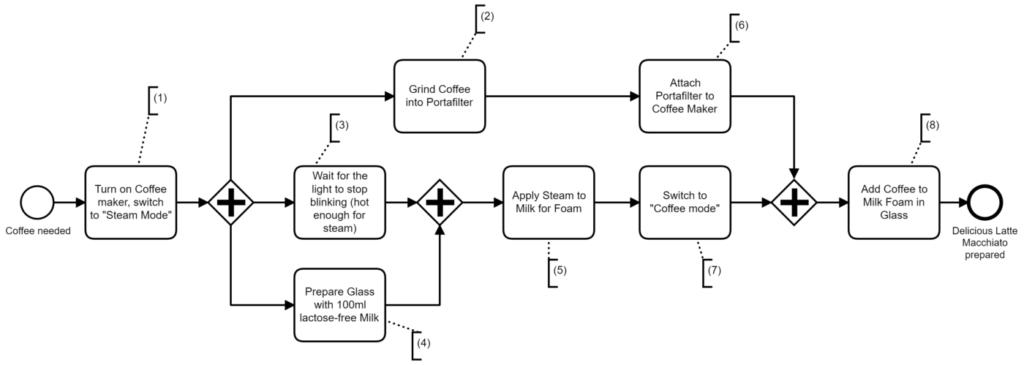
And this is only the “Happy Path” – when nothing goes wrong, and when you have already figured out the process!
The first thing to do, is obviously, to switch it on, and also, not so obvious, switch it to “steam mode” (1), which will heat it up enough to produce steam.
Your ability to multitask is very important here. I mean, you could do it all in sequence, but it just makes sense to grind the coffee (2) while the machine is heating up, and you are waiting for the blinking light to stop, (3).
Also, make sure the milk is already in the glass (4) before trying to steam it up (5) … otherwise, that might not end well.
After you’re done with the milk foam, you have to switch back to “coffee mode” (7), which starts cooling down the machine from over 100°C (to produce steam) to under 100°C (hot water for the coffee).
Again, no point in wasting precious time, and while waiting for the cool down, you should remember to attach the portafilter (6) (with coffee inside) to the Machine, if you haven’t already done so.
Finally, with the portafilter and the glass with milk foam in place, you can add one espresso worth of coffee to it (8), and you are ready to go!
Sure, it is a lot of effort for something so mundane like a simple cup of coffee. Especially when all this would be available at the simple press of a button.
At the end of the day, to each his or her own, and I must admit that while I fell in love at the first sight, in the meantime, I’ve partly switched back to the fully automated version most of the time. At least for my morning coffee, that is.
Finally, with my passwords changed, and my coffee needs satisfied, I had time to do what I was supposed to do: read some chapters of the book the certification is about.
Learn for the Certification
The Learning Material started with an example:
Let’s assume you work at a company, and you are in charge of the Twitter Department (yes, they have a full department for that). Many people can write, or better yet, propose Tweets, and you are the one person in charge of deciding what to actually put online.
Since the dawn of Twitter, you have been doing it manually: people sending you Emails, passing paper notes, you know. But it is now time for some automation at last!
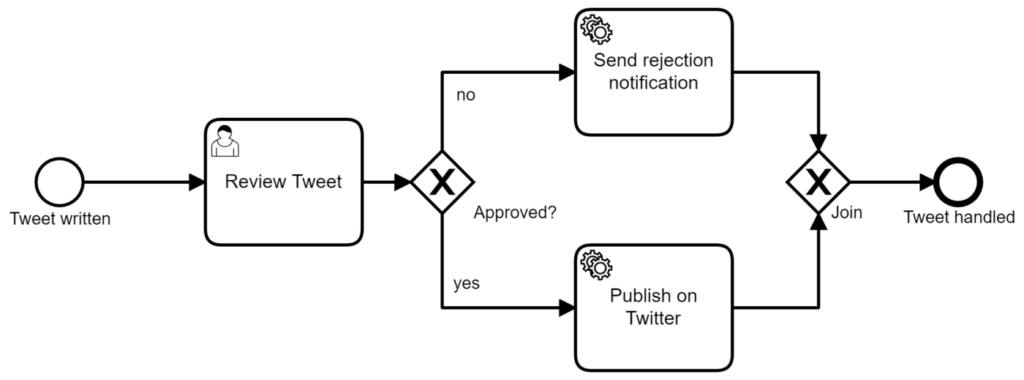
As soon as a tweet is written, they should be collected in a “Task List” of sorts, where you manually check if they are tweet-worthy or not. When you approve, ideally the message should be direct Twitter, and if you reject, the sender should get an email** asking him to try harder next time.
Run the example
Without further ado, download [example-twitter.zip] and run TwitterServletProcessApplication.java (it has a main() method).
Visit http://localhost:8080/, enter demo / demo as username/password, click away the “Camunda Needs You” screens, and voila, say hello to your process automation engine:
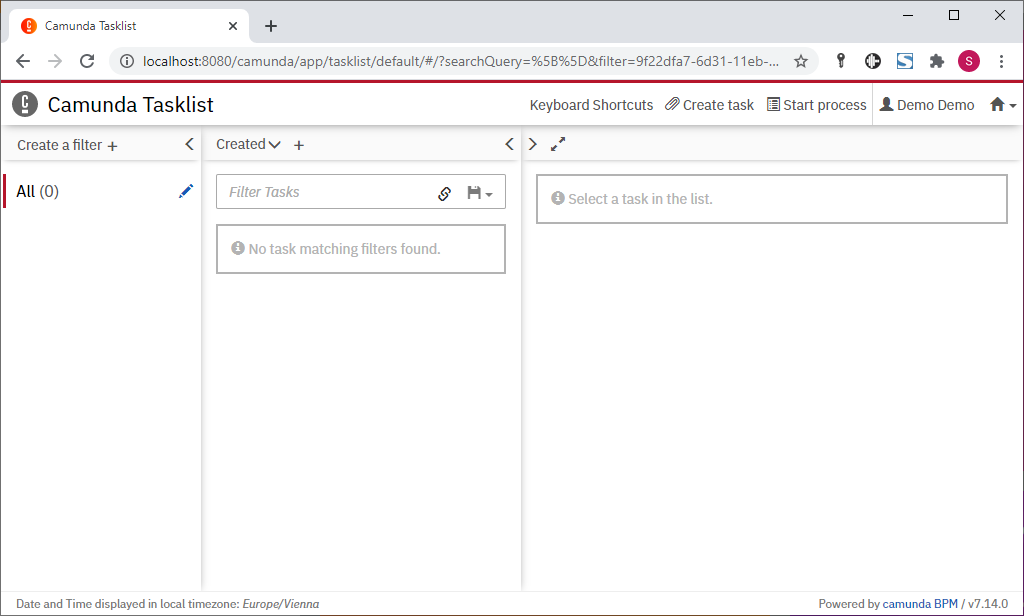
Click on “Start process” (close to the top right), select the only one available Process, and enter your email and desired content – pretend for a moment you are not the Boss of the Social Media Team:
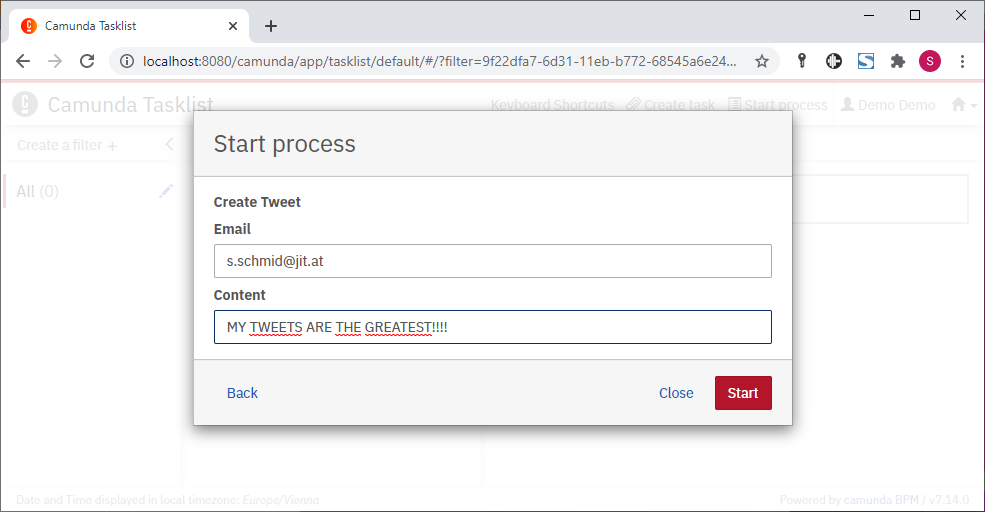
After which you click “Start” to submit the process.
In the lower right you are informed that the process has been started, and a Task has been assigned to you, asking you to review the Tweet:
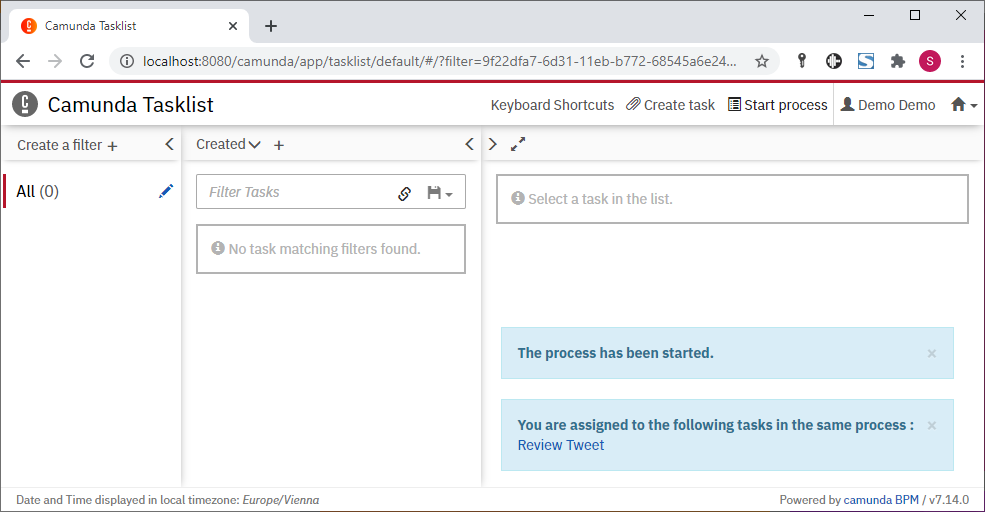
If you follow up, you see that a task has appeared, waiting for you to check “Approve” and click “Complete”:
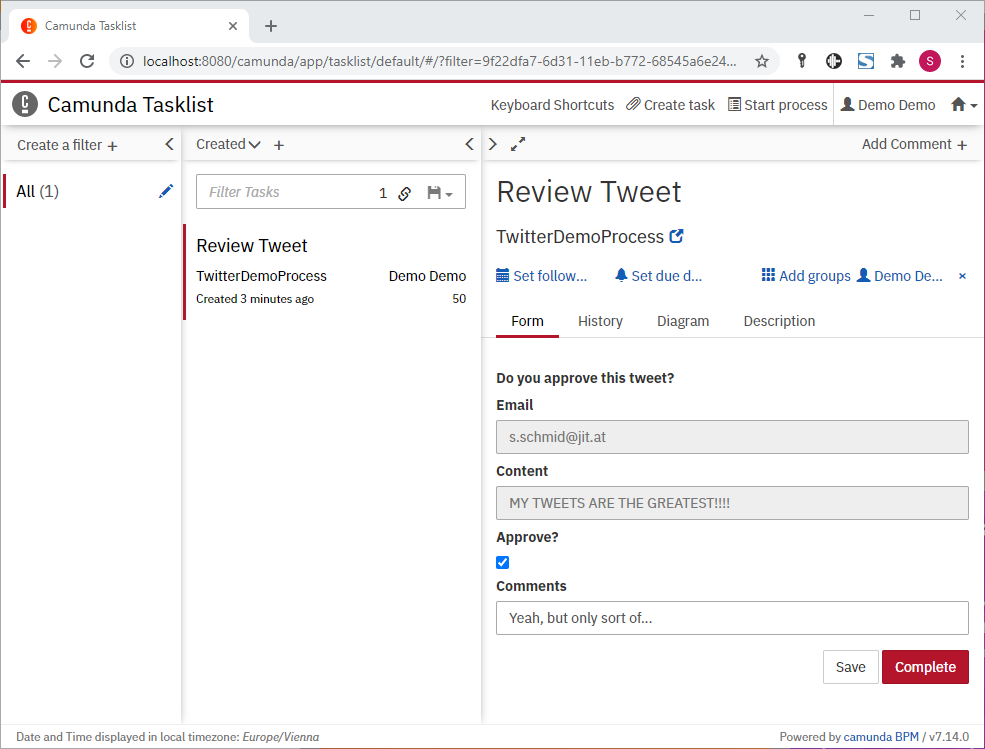
If everything went right, your Tweet should appear at https://twitter.com/cmnda_demo/, an account used by Camunda specifically for their Tutorials. You can see all sorts of people working through the tutorials there, blessing the internet with their wisdom.
What else?
If you made it so far, and you want to learn more, you could:
- Start a new Java Project, based on an archetype only: How to set up your java project with camunda
- Download Camunda Modeler, which allows you to edit executable process diagrams (Open Source Software)
- Watch the excellent Videos from Niall Deehan, starting at 2 Camunda Tutorial for Java Developers
- Check out our Jobs at https://j-it.at/karriere/ – we are always looking for Java Developers!
- Reach out to me if you have any questions regarding BPMN and life in general
Sebastian Schmid
JIT Senior Software Engineer
Original Photo by George Kroeker on Unsplash


